

Cello thumb position is one of the big leaps of technique for advancing cellists and is one of the skills that sets more advanced students from the intermediate. This new technique opens up the higher ranges of the instrument and allows us to play more advanced solos and etudes. This technique is not something you should rush into though! Make sure to take things slowly at first and master the basic concepts before moving on.
When Should You Focus on Your Cello Thumb Position?
There have to be many items already in place before jumping into this advanced technique. Cellists need to make sure that they have a secure command of their bow, superb intonation in first through sixth position or so, the ability to play three octave scales in tune, fluency in tenor clef and some proficiency in treble clef, and most of all: relaxed and properly shaped thumb/hand technique.
There are many students who come into thumb position and have a very tight and straight thumb that causes many issues with intonation and pain in the hand. Loosening up the thumb and making sure to stay as relaxed and natural as possible is the first step in having a good thumb position! Please make sure that your thumb is relatively relaxed when playing in the first positions and does not lock and bend backwards.
A great way to find a relaxed thumb position for all your playing is to let your arm hang by your side and then bring your hand up to whatever position you need. Your thumb, fingers, wrist, etc. should not tense up or really change position from the relaxed position by your side to the instrument.
What Should You Avoid When Positioning Your Thumb?
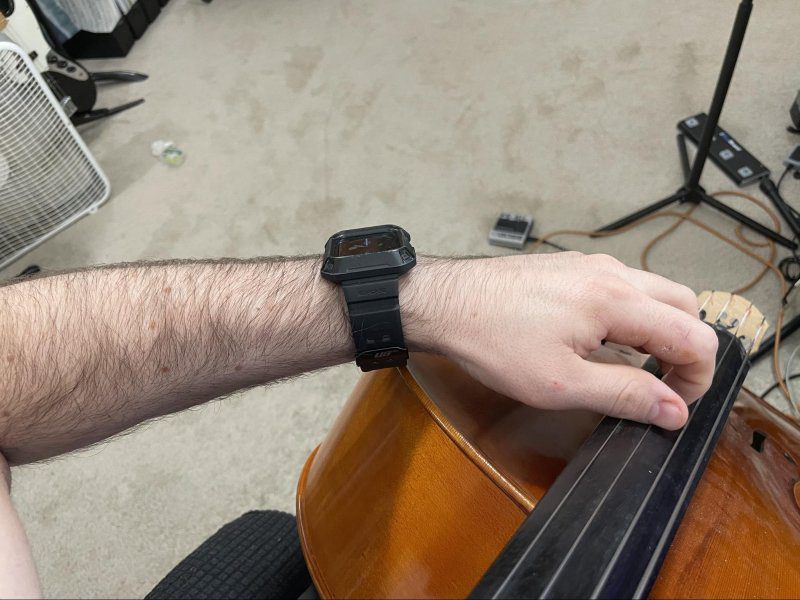
The way your thumb is flexed in thumb position is directly related to the first positions. Your thumb should not be straight or locked, but should be relatively relaxed. You will place your thumb with the strings touching your thumb somewhere between the main knuckle and the nail on the side of the thumb.
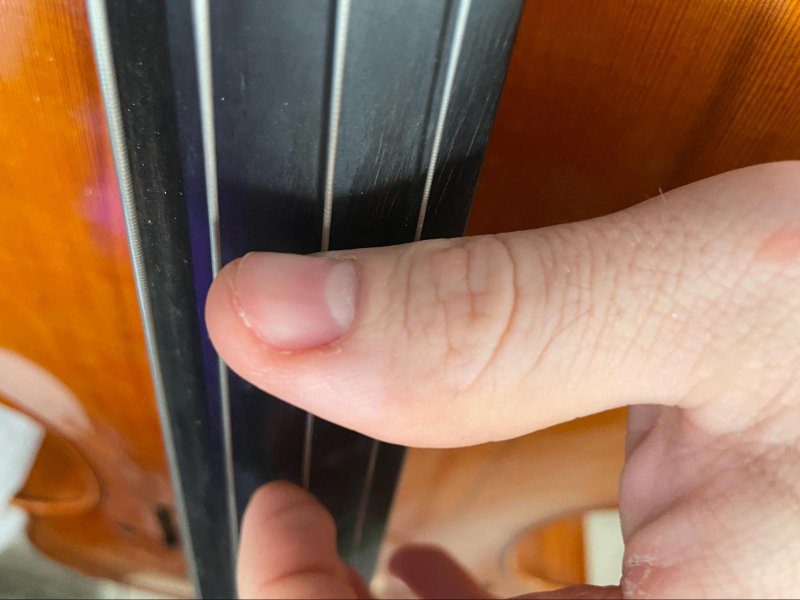
The exact place will of course vary from person to person as each person’s thumb will be a different length, but you should not really be placing the knuckle of the thumb on the string. The wrist will stay straight in thumb position and shouldn’t flex one way or the other. Another of the most common issues with starting thumb position is when the wrist starts to bend backwards.
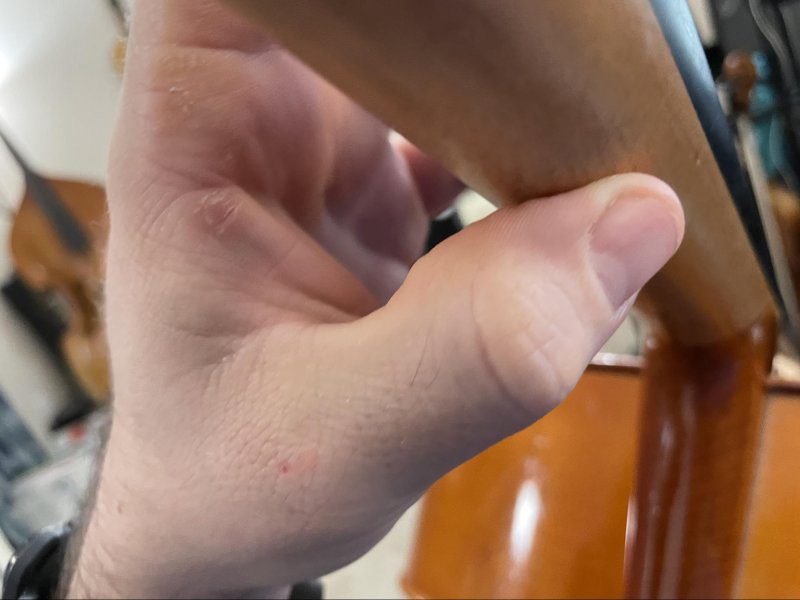
The weight of the arm is central in helping to press the strings down. Finding the most relaxed position to hold the strings down is very important while still keeping your hand and arm in alignment. Your elbow will probably lift up from its normal position into a more elevated position as to keep the relatively straight wrist. This change from the lower neck positions to thumb position should not change the elevation of the elbow too much though!
You don’t want your elbow flapping about like a chicken wing! Your thumb should be able to smoothly move from the neck positions to thumb position! Try sliding your hand up and down the neck from first position all the way to the end of the fingerboard while bringing your thumb off the back of the neck to the front of the fingerboard.
While holding the strings down with the thumb is an important skill, you do not HAVE to keep the strings held down the entire time. Unless actively playing the notes under the thumb, you can rest the thumb lightly on the strings while you are playing with the other fingers.
How Do You Place Your Other Fingers?

The other fingers are going to be placed slightly differently from the neck positions. This new finger position is actually closely related to how a violinist or violist would be placing their fingers on the strings. While in the neck positions we mostly have the whole step represented in our hand by skipping a finger, the whole step in thumb position is played by spreading the fingers apart, similar to the way we would be performing an extension in the neck positions.
The half step in neck positions is represented by playing from one finger to the next finger, such as finger 3 to 4 for F# to G on your D string. In thumb position this is still the case, but much closer together.
Try This Exercise to Start Perfecting Your Thumb Position
Think of taking the notes of your D major scale on the D and A strings in neck position and shrinking it down to half the size. Now in thumb position use your thumb to play D, first finger for E, second finger spaced out from the first for F#, and then third finger right next to the first for G. Repeat the fingerings for the A string. This is the 2/3 fingering pattern, or half step is placed between the second and third finger. There is also the 1/2 finger pattern with the half step between first and second finger, the T/1 pattern with the half step between thumb and first finger, and the open pattern where there are whole steps between all fingers and thumb. 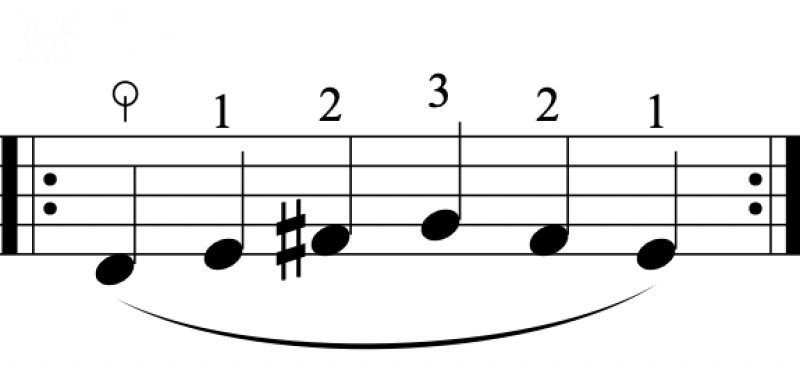
Some of the best exercises for thumb position is to go back through your scales and simple folk songs with this new fingering pattern. Many of the thumb position books use these ideas to teach each of the notes and patterns utilized in thumb position.
Start off by trying to play your favorite beginner piece such as Twinkle Twinkle Little Star or French Folk song from the first Suzuki book, but up the octave! If you need more resources, please check out the various thumb position books from Rick Mooney and Cassia Harvey.

Jonathan Todd