
Learning to use the bow is the least intuitive part of playing the cello. Most beginners are afraid their bow will slide off the strings or they will drop it. I recommend practicing in front of a mirror so you can visually inspect your bow habits. This article cannot replace a teacher’s direct guidance in establishing a bow hold, but I hope to give you some basic advice to improve your current cello bow technique in two areas: the bow hold and the bow use.
Cello Bow Hold
To set up a good bow hold, grab the grip with the index finger by the second knuckle and put the pinky on the eye of the frog, spacing the fingers evenly between the two. The thumb goes under the wood, curved slightly so the fingertip touches the bow in the center across from the other fingers. The bow hold should be both balanced and relaxed.
To balance the right hand, think of your fingers like a see-saw: the index finger and pinky are weights on each side of the thumb, which balances the bow. Relax the hand so the fingers are slightly curved and you can bend the knuckles easily. As you move the bow arm the hand should feel smooth and effortless, not clenching or gripping the bow.
Cello Bow Use
Next you must consider how the cello bow touches the strings and moves spatially, or in other words, the bow use. The four basics of bow use are placement, angle, weight, and speed, which you can remember with the acronym PAWS. Placement is the vertical contact point of the bow hair to the string, and can be changed to impact the sound color. Change the placement by opening up the elbow and adjusting the wrist accordingly. A high bow placement results in a thin and transparent sound color, but a low bow placement will give a more dense sound.
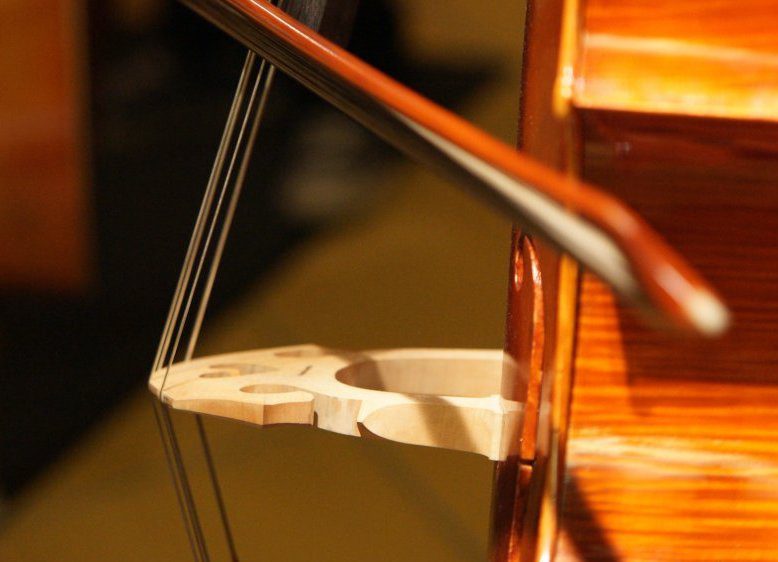
Angle refers to the direction the bow is pointing relative to the string, and changes according to which string is being played. The bow angle follows the curve of the bridge, as you are looking down through the bow try to make the wood “touch” the top of the bridge. When playing on the C string, the bow should be angled so the tip is pointing forward and to the left.
This way, the bow hair pushes to the left and won’t hit the G string. Moving over to the A string, the bow should be angled so the tip points behind and to the left so the bow hair pushes to the right and won’t hit the D string. On the inner strings, find the angle which prevents hitting the adjacent strings on accident. The D string angle has the tip of the bow slightly to the left and backward, and the G string angle will point the tip slightly forward and to the left.
Using the Weight of Your Arm
Weight in the cello bow comes from the arm, which must be totally relaxed to let all the weight fall into the string. As I mentioned before, beginner cellists are afraid their bow will fall off the strings unless they clench the bow tightly or hold tension in their upper arm. Your teacher can help you set up the bow arm so that the weight goes down from the upper arm, curves through the elbow and forearm, and finally rolls through the wrist and first finger into the string. You can change the weight for color changes, and slight dynamic changes.
Changing the weight too much can bend the string and change the pitch. Very small changes in weight allow for different bow articulation. For example, a staccato stroke is made by using more weight at the beginning of the note, and a total stopping of the bow with the weight still down to create space before the next note.
Bow Speed, Or Bow Distribution

Speed is the last variable to consider, and makes the most difference for the volume and therefore the shaping of phrases through dynamics. Some cellists refer to speed as bow distribution, because you can consider the relative amount of bow the different notes should take. Practicing in front of a mirror makes bow distribution much more reliable. Always remember the law of bowing: for every upbow there is an opposite downbow.
This means you should plan not only your current note or phrase, but also where you will need to start the next note. A notorious example of challenging bow speed is the melody from the first movement of Elgar, in which you must slur four notes downbow, then return to the frog with only two notes upbow without a crescendo.
Practicing Good Cello Bow Technique Will Improve Your Sound Quality
Practicing with good cello bow technique is the fastest way to improve your sound quality, and important for making sure you don’t injure your right hand by straining to hold the bow. Use the tips above with a relaxed bow hold and remember to use your PAWS for different sounds. Practice in front of a mirror so you can clearly see what a difference these practice tips will make.

William Crider