

Last month we learned how to get started using Adobe Photoshop. In that article, we covered the essentials of Adobe Photoshop for beginners. As you know, the program can be a bit intimidating. However, you will amaze yourself at how much you can do in a short time by taking little steps. Photography basics include knowing how to use Adobe Photoshop. So, you’ve come to the right place.
Review the Beginner’s Guide – How to Use Adobe Photoshop and remember how to set up your file folders and your digital workflow. Here’s a quick reminder about the Adobe Photoshop workspace, plus a couple of new tips.
- Menu bar – File, Edit, Image, etc., allows access to commands, adjustments, and panels.
- Options bar – (under the Menu bar) shows options for the currently working tool.
- Tools panel – on the left are tools for editing your images and creating art. Don’t forget they are grouped in a stack.
- Panels on the right – Color, Layers, Properties, and others contain controls for working with images. You can arrange these to your liking in the Windows menu.
- Document window – in the middle is the current file on which you are working. You can have many documents open at a time with tabs at the top in the Document window. These tabs can be released and float on their own.
- Ways to close an image – click on the “X” in the upper right corner or use the Menu bar to choose file>Close.
This article, Going Deeper into Adobe Photoshop for Beginners, shares the next steps in our education. Again, we address this from a photographer’s viewpoint.
As you learn the menu, toolbar, and palettes’ commands, make it a point to learn the keyboard shortcuts. It will save you a lot of time. Think of it like you are an orchestra conductor. You’re directing with the right hand and signaling with the left hand. Working in Adobe Photoshop then becomes a symphony.
Zoom In and Out Plus Pan Around

The Zoom tool is at the top of the Tools panel on the upper left. Use the options bar to Zoom In or Zoom Out. Use a keyboard shortcut by holding the Cmd/Ctrl key then tap the “+” or “-“key.
The Hand tool, also in the Tools panel, allows you to grab the image and drag it around in the work area. Use the keyboard shortcut by holding the spacebar down with your left hand and scrolling around with your right hand on a trackpad, using the mouse, or even better, your Wacom tablet and stylus.
Learn more about a Wacom tablet at this link. Using a stylus takes a little practice but allows so much more control while working on your images.
Undo or Redo a Command
One way to undo a command or several commands is to use the History panel if you don’t like the effect. Just click on the command above the one you wish to delete. Even easier is to press Cmd/Ctrl and “z” on the keyboard with your left hand to Undo the last command or Cmd/Ctrl and “z” to Redo. To do multiple Undos, in the Menu, select Edit>Step Backward numerous times or use the Option+Cmd/Ctrl+z on the keyboard simultaneously.
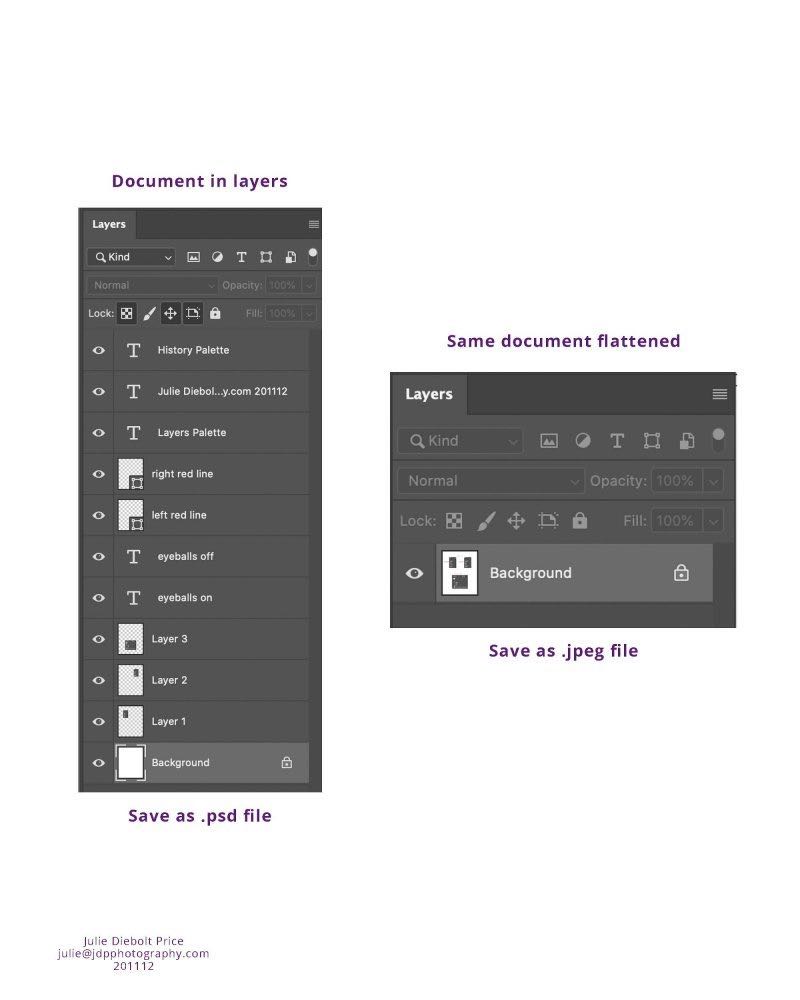
Working with Layers and the History Palette
Layers contain text, images, or objects. You work on a single layer, and it doesn’t affect the work on other layers. Be sure to select the layer (highlight it) to make it active to work on that layer.
The Layers palette in the right hand panel arranges the layers in stacks. To view the content of a layer, turn on the eyeball. Click on the eyeball to turn it off. This is an easy way to see the effects of your work.
Click and drag on a layer to change the order of it in the stack.
Copy the layer by dragging it to the icon next to the trash can at the palette’s bottom. Another way to copy the layer is in the menu, select Menu>Layer.

Change Layer Name, Opacity, or Delete
Change the current layer’s name by double-clicking on the current name, type a new name, then press Enter/Return.
The Opacity slider at the top of the Layers palette allows you to make the layer more or less transparent.
Delete a layer by selecting (highlighting) it, then press Backspace/Delete.
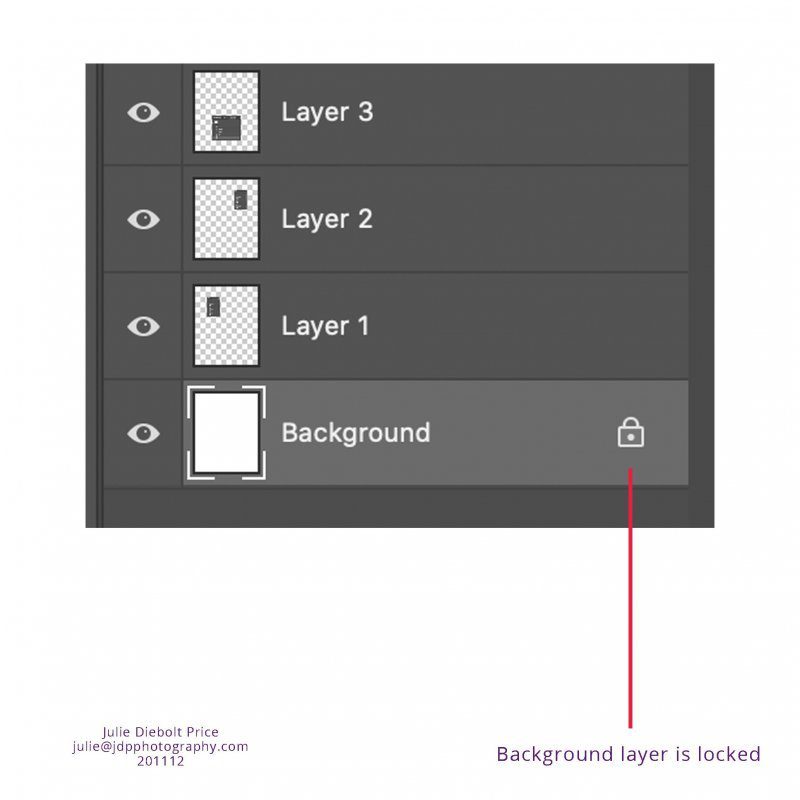
Background Layer
Notice that the Background layer has a lock on the right side of that layer. This layer cannot be moved up in the stack, nor can another layer be moved under it. You cannot move the layer around with the Move tool, you can’t change the opacity, and you can’t have transparent pixels on the Background layer. It creates a stable base for the composition made from the layers above it. To convert it to a Layer 0, click once on the lock. You can then move it around and treat it just like another layer.
Things to Remember
- Become an orchestra maestro using the keyboard shortcuts with your left hand
- Save your work files in layers in .psd format (in the WORK folder)
- Save your completed files flattened in .jpeg format (in the COMPLETE folder)
- Personalize your workspace and palettes to suit your needs in the Menu>Window>Workspace
Conclusion
While there may not be a limit on the number of layers you can have in an Adobe Photoshop file, keep in mind that the file size increases as you increase the layers. Unless you have a fast processor and large graphics card in your computer, it will slow down your processing capability significantly.
Creating and using layers as you learn how to use Adobe Photoshop will open your eyes to all the exciting capabilities of this industry-standard software.
Consider using Adobe Photoshop Lightroom before taking your images into Adobe Photoshop for the more complex image manipulations.
Remember, you can review more Adobe Photoshop for beginners essentials in this article, get one-on-one assistance here, and we will cover Lightroom in an upcoming article.

Julie Diebolt Price