
The best photography lighting is based on several factors, and depends on what type of look you want when it comes to your photos. Natural lighting versus studio lighting brings about two different looks in your photography. We’ll be discussing natural lighting, which does not need any equipment. And we’ll also discuss the benefits of two styles of studio lighting.
The natural lighting of a photo will be much softer and a warmer look while using studio lighting gives your photos a more overall even lighting that has a colder hue.
When choosing the best photography lighting equipment for you, you need to decide the look you want in your photos.
- If you would like your photos to have a subtle, softer, warmer look, go for a continuous lighting set up.
- If you do a lot of studio work, need something for portraits and lighting for product photos, go for Strobe Lighting!
Natural Lighting
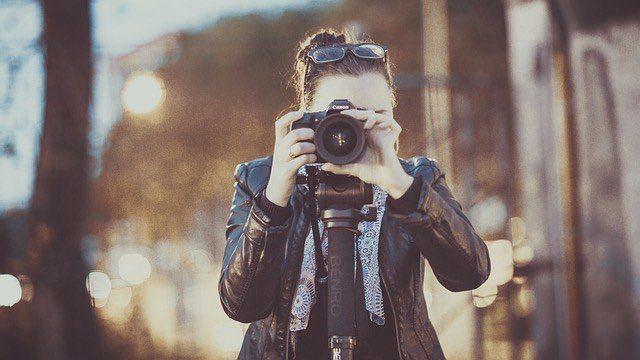
To begin, we can start with natural lighting. This is the lighting I prefer for my normal, day to day, photography. This style of photography lighting gives a photo a more warm and natural look. Natural lighting doesn’t need special equipment and can be utilized using the natural light from a window. By placing a subject near a window or even using a small desk lamp to light some darker areas, you can utilize the lighting around you. This allows you to take low maintenance and wonderful photos without investing in lots of equipment.
Blacklighting
However, if you are using windows or other lighting, you will always want to be aware of back lighting. This is a huge “no no” when taking photos of people. Backlighting is where the light source – whether it’s sunlight or any other source – is behind the subject. This will leave your subject dawned in darkness, which if you are going for a more “fine art” look in your photos, will make a wonderful overall look. However, if you are not going for this style of photo it could leave you saying, “oh no!”
Continuous Lighting
Studio lighting comes in various types and produces different looks. One of these types of studio lighting is called continuous lighting. These are studio lights that don’t do the “flash” we all suffered through during school photos. These lights produce a continuous light to light your subject matter. The bulbs on this style of photography lighting can be changed from a more natural and softer bulb, to an LED or florescent bulb.
This is my personal favorite style of lighting. Why, you ask? Let me tell you! I enjoy this style of photography lighting for several reasons.
- First, I have found when taking studio portraits, of children especially, the flash of a strobe light is somewhat terrifying! Children sometimes cry even. To avoid this flash, I use continuous lighting.
- Second, unlike with strobe lighting, you will always be able to see exactly what the lighting will look like without accounting for a strobe.
- Third, this style of photography lighting is very easy to set up and get started with your shoot.
- Lastly, this style is much more affordable for photographers.
Strobe Lighting
The next type of photography lighting is called strobe lighting, these studio lights have a “slave” flash in them. When the flash on your camera goes off, it triggers a flash within the lighting itself and then we get that bright flash, the one we ALL remember when we were in grade school. This is very common lighting equipment for studio lighting when doing portraits and product photos.
This style of photography lighting is a “cooler” lighting, meaning when taking the photo you will get a cooler white balance or “hue” than with other methods. You may have to change from an auto white balance to another setting to account for this, but it can be done easily.
The thing I personally dislike about this style of studio lighting is my inability to see the lighting until I take the photo or trip the strobe to see the lighting you will get. Because the final lighting isn’t seen by using the strobe lighting, you must trip the strobe to see it before taking a photo, or take a photo and review it to see what the final product will look like.
- Strobe lighting is perfect if you can get past the inability to see the after-effect right away.
- If you take product photos or photos that need to be uploaded to Etsy, Amazon, or eBay, this style of lighting is a good choice. It creates a better lit and nicer white balance for photos than a continuous style lighting.
Finally, never let lighting equipment or the lack of equipment hold you back. Natural lighting is a wonderful tool for photography, but if you would like to step up to some photography equipment check out these options and pick the one you feel most comfortable with!

Tiffany Schank