

Ukulele is mostly thought of and played as an accompanying instrument to songs. Therefore, it is usually strummed. Strumming a ukulele is a wonderful sound and immediately transports the listener to a different world – usually an island getaway.
While strumming is certainly the main part of most ukulele playing, it is also a great instrument for fingerstyle playing. In this article, we will explore how to read ukulele fingerstyle TAB and some tips and tricks for playing in that style.
We will begin with a framework for fingerstyle playing in general, which will help our understanding of what we read and how to play.
The Fretting Hand, Mostly Plays Chords

The not-so-big secret of fingerstyle playing is that the fretting hand mostly still plays chords as in the strumming style. The big difference lies in the picking hand technique. When playing fingerstyle ukulele, we break up the sound of the chords by playing single strings at a time.
For example, if you hold a regular C major chord with the fretting hand while playing the following string pattern with the picking hand: 3-2-4-1 – this gives you a nice broken chord texture known as an arpeggio. Knowing this is mostly what happens when playing fingerstyle ukulele can help us read the TAB.
Let’s look at that example of the C chord written out in ukulele fingerstyle TAB.
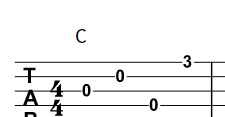
Notice that if you stacked all of the notes in the TAB, you would just get a regular C chord. This is the big trick to reading TAB well in general, but it is especially helpful for reading ukulele fingerstyle TAB. The next question you must ask is “what fingers do I use on the picking hand?”
Now let’s figure out which fingers to use to play the arpeggio. The general rule for fingerstyle playing is to use the thumb for strings 4 and 3 and use the index finger for string 2 and the middle finger for string 3 – this is exactly what we do for this arpeggio. We write the picking-hand fingerings using letters as such: thumb = p, index = i, middle = m, ring finger = a. So, the picking pattern for our example goes like this: p i p m. We don’t often get the picking patterns written on the TAB, therefore, we want to practice some basic arpeggio patterns that come up frequently in music to get used to seeing what they look like and which fingers to use.
Exploring common arpeggio patterns is good practice for using your fingers and learning how to recognize the patterns while reading TAB. Let’s take a look at some common fingerstyle ukulele TAB examples.

Again, notice how the thumb (p) is used to alternate between the 4ths string and the 3rd string, and the index (i) on the 2nd string, while the ring finger (a) plays the 1st string.
You can use any chords on the fretting hand to practice this. It sounds great to switch chords after playing the pattern once or twice on each chord. Each measure is a different pattern. Practice the 1st measure pattern repeated over and over. Then move on to the second measure pattern and repeat that over and over.
You would not typically switch patterns in the middle of a song. Choose one of those patterns and apply it to a song you would normally strum.
The last two measures combine each of the separate patterns into one measure. This is rarely done in the context of a song, but not unheard of. Use those two measures mostly as practice to develop more finger independence.
The next examples show some more common fingerstyle ukulele TAB patterns.

Practice the patterns just like the previous ones – each measure is a separate pattern in the first two measures. The last two measures combine the two patterns into one measure. Learn to recognize these patterns and you read more fingerstyle ukulele TAB. You will know how to apply the picking hand fingerings.
One last part of the framework is to understand that playing fingerstyle ukulele often involves some alterations to the fretting hand chord shapes. You simply move fingers from the chord shape to reach the new notes. Let’s look at an example from a popular song.

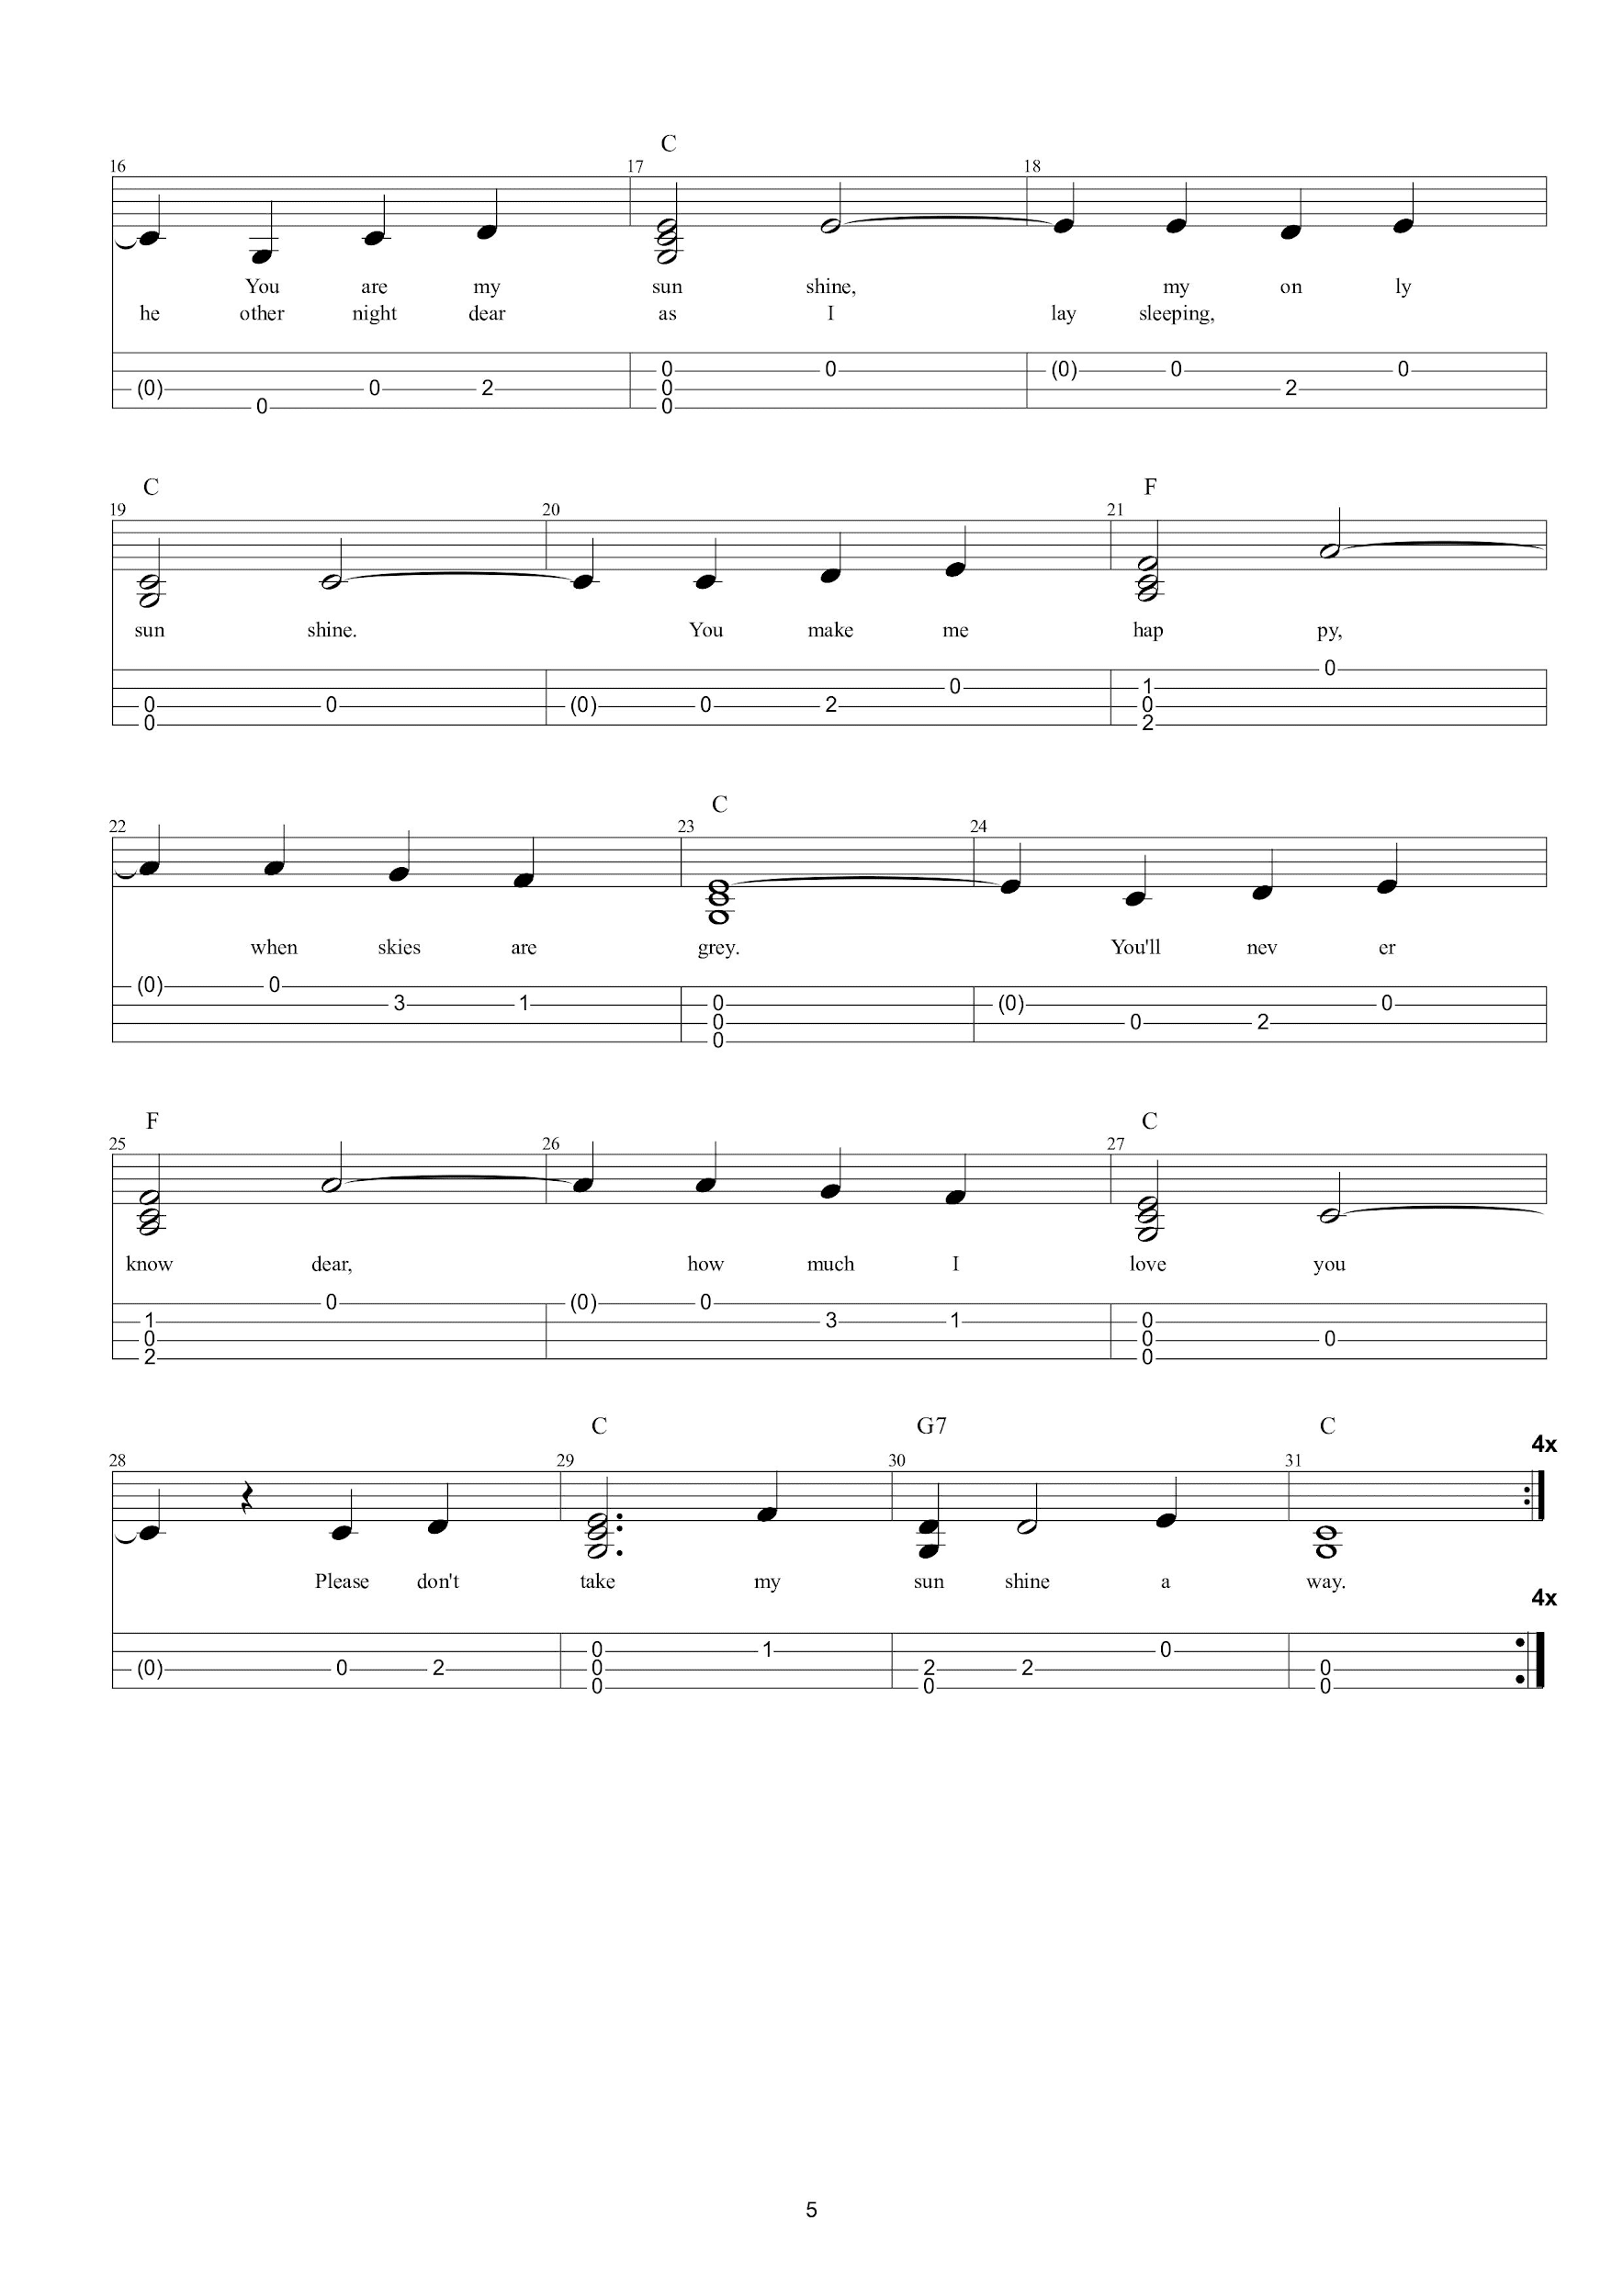
In this example, we are playing the chords and the melody at the same time. This requires fingerstyle playing.
Notice the chord in measures 1 – 3 is C. Can you figure that out by just looking at the TAB? Also, notice how there is a note that is not originally in the chord shape of C – the 2nd fret on the 3rd string. If you play the C chord as usual with the ring finger holding down the 3rd fret of the 1st string, then you can simply use the middle finger to temporarily play that 2nd fret on the 3rd string. You don’t have to change the chord, you just have to add a finger to the shape. In order to play the three “0s” in measure 2, we would use the p i m to “pinch” the strings at the same time.
Learning to read fingerstyle ukulele TAB is gresata practice for recognizing chord shapes and picking hand patterns. Practice the arpeggio patterns to help improve finger dexterity and know which fingers to use in order to play the TAB. Practice recognizing slight alterations to the chord shapes in the fretting hand and you’ll be off to a good start.
Learn those common patterns and apply them to songs you would normally strum for a different sound. Enjoy the new possibilities and songs that this style opens up to you.

Justin Martinez