
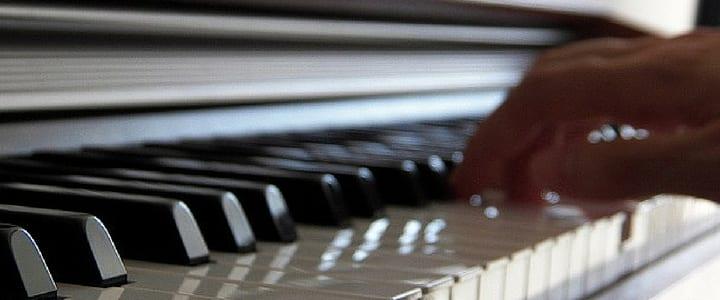

Sitting down at a piano and playing a few notes is a pretty easy task. However, the ways in which we control the muscles in our hands, arms, and shoulders play a very important role in our ability to play the piano well. If you want to master this instrument, you need to set yourself up for success.
Before you can start playing the likes of Mozart and Beethoven on the piano, you should start with building a strong foundation. One way to do so is by incorporating hand exercises for piano beginners into your daily practice. These exercises can help you practice good hand positions to better control your sound. Doing the right piano finger exercises on a regular basis can also help prevent injury and improve your overall technique.
But how exactly do you do piano finger warm-up exercises? We’re here to provide you with all the information you need to master finger exercises for piano beginners.
In our guide, we feature nine of the best piano finger exercises to help you improve your music skills, from speed to technique. Do these warm-ups every day, and you will begin to see a significant improvement in your piano skills before you know it.
What is Good Piano Finger Technique?
Before you jump into these piano exercises for beginners, it’s important to have a solid understanding of good piano technique. Good technique is based on the idea of playing “from the finger”–or using the fingers as your main driving source of power.
If you’re self-taught or new to piano, most of these ideas will be unfamiliar to you. If you’ve been playing for a long time and using different techniques, breaking bad habits may take a little time.
In essence, good piano finger technique utilizes the following four elements:
- Fingers should not be flat or floppy–knuckles should generally not be straightened.
- Typically, most fingers will be slightly bent at the knuckle closest to the fingertip. The exception is the pinky finger, which can be straightened at times.
- The primary power source of most playing will actually come from the finger–specifically the knuckle at the top of the hand–rather than the wrist or arm.
- The arm, elbow, and shoulder should be relaxed, with a very early preparation of the thumb and other fingers while playing.
Playing “from the finger” is incredibly important. Just think of how objects move; if you’re holding a pencil in your hand and want to move it extremely quickly, is the motion large or small?
Likewise, in piano playing, if you wanted to play an extremely fast succession of notes, would you opt for large-scale muscles or small-scale ones?
You wouldn’t use your whole arm and upper body to rapidly move the pencil back and forth, so why would we do that when playing the piano? With this notion in mind, it’s easy to understand why using good piano technique is incredibly important.
Common Piano Finger Technique Mistakes
Beginner piano students use a variety of interesting alternatives to proper piano finger technique. Here are a couple of those common mistakes that should be avoided:
- Rather than adjusting their piano hand position, many students compensate with their wrists by moving them very high or very low. In either position, unnecessary tension is added which reduces speed and accuracy.
Oftentimes, beginner students will play from the arm, rather than the finger, which makes for an overly rhythmic sound that tends to create accents on beats in which there are none written.
9 Piano Finger Exercises for Beginners
Now that you have a better understanding of some of the basic dos and don’ts of piano playing, you’re all set to take on some finger exercises for piano beginners. There are so many different warm-ups available, but if you’re looking for finger exercises to increase your speed, start by checking out the helpful tutorial below. There are even more exercises listed below the video, so you can find just what you’re looking for!
In addition to those handy tutorials, here are some more of the best piano finger exercises for beginner students to try. The following piano exercises should be done with a consistent tempo, even if it’s very slow. As long as you practice these warm-ups daily, they will soon become second nature as you build muscle memory and improve your finger coordination.
1. Focus on 5 note pentascales using one finger per note (C D E F G)
In this piano finger exercise, the student will play down one finger at a time and listen to the result.
Change dynamic ranges only using your hand muscles rather than your whole arms or shoulders. This is an easy exercise, but also surprisingly difficult for those who may not have strong hand muscles yet. This basic piano finger exercise can help build up your finger strength.
2. Practice ascending and descending pentascales
After you master the first piano finger warm-up exercise, it’s time to play an ascending and descending pentascale from the lowest to highest finger with both hands.
For instance, the left-hand pinky will play with the right-hand thumb and so on. Use the proper piano finger techniques discussed earlier.
3. Play in thirds (skip notes) between each note
For this next piano finger exercise, you’ll work on skipping notes. Using a pentascale, play in thirds (skip notes) between each note. Train your fingers to play every note legato–connected.
This is another one of those piano finger exercises that sounds easy and simple but really takes practice to master. Take it slow at first and incorporate this exercise into your daily practice until you get the hang of it.
4. Play with firm finger position
Learning to play with a firm finger position is key to excelling at this instrument. While having your hands at playing level though not actually on the keys, prepare (bend) the knuckle closest to the fingertip as though it were playing.
Lift your hand while keeping the finger position, then let it fall onto the key. If the knuckle collapses, try again from a lower height.
In essence, this finger exercise prepares you for the sensation of playing with a firm finger position without adding any arm weight or tension to the scenario.
By dropping your hands and arm on the keys, it allows you to focus fully on getting a solid finger position.
5. Go for over-legato
Play the notes in such a way that each note overlaps with the subsequent note.
For example, if you were playing a C major pentascale, you would hold down your thumb until you played your index finger, after which you would lift your thumb and play your middle finger, etc.
This piano finger exercise is great for developing awareness of your fingers and learning to control each one individually. It’s actually surprisingly difficult for beginner students to do this exercise well! Although it can be challenging, be patient and don’t give up. This basic piano finger exercise can do wonders for your playing skills.
6. Practice full (1 or 2 octave) scales
Practice full (1 or 2 octave) scales while preparing the thumb before it’s actually played.
For instance, in a C major scale, after you have played the first D with your right-hand index finger, immediately prepare the thumb so that it is ready on or near the note F. Practice all scales in this manner.
If done properly, this exercise will eliminate bumps in your scales and passagework and allows you to play with greater speed and accuracy.
7. Play two notes at a time in one hand
For instance, the right-hand thumb and middle finger play simultaneously while the other fingers relax.
It’s important to verify that the other fingers are, in fact relaxing, as they will often try to interact when they don’t need to.
The pinky finger is especially notorious for wanting to be a part of everything the other fingers are doing, even when unnecessary.
8. Press down on all five keys
Similar to the above exercise, this warm-up challenges you to focus on finger independence.
Begin by pressing down with all five fingers on five piano keys at once. Now, one by one, lift one finger up while keeping the other four fingers engaged and pressing down on the keys.
At first, it might seem easy when picking up your thumb or index finger, but your ring and pinky fingers will likely pose a bigger challenge. In fact, you may not even be able to pick up those fingers just yet. Remember, practice makes perfect.
9. Pick up Hanon & Czerny piano technique books
Want access to even more techniques? These books are fantastic for getting a student’s fingers to cooperate! Go through these with the techniques mentioned previously for maximum results.
Czerny is quite a bit harder than the early Hanon books, so keep that in mind when deciding on a finger exercises book.
We hope you find these piano finger exercises helpful as you learn how to play the piano. Using these piano finger exercises on a consistent basis while practicing proper technique will greatly enhance your ability to play the piano well. For more guidance, you can always turn to in-person or online piano lessons to help further master the piano. Your private tutor will provide you with additional hand exercises for piano beginners to bring your music skills to new heights.
 Post Author: Ryan C.
Ryan C. teaches piano, ear training, and music theory. He is a graduate of San Diego State University with a B.M. in piano performance. Learn more about Ryan here!
