
![How to Tune a Violin For Beginners [Instructional Video]](/_next/image?url=https%3A%2F%2Ftakelessons.com%2Fblog%2Fwp-content%2Fuploads%2F2015%2F10%2Fhow-to-tune-a-violin.jpeg&w=3840&q=75)
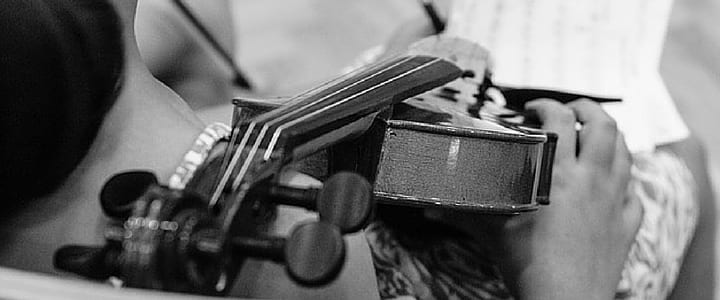 Learning the right way to tune a violin is essential for beginning violinists. Below, experienced violin teacher Naomi Cherie S. provides a step-by-step tutorial on how to tune a violin for beginners.
How Do You Tune a Violin?
Eventually, you’ll want to learn to tune a violin by ear, but that can take years of practice. In the beginning stages of your development as a violinist, it’s best to learn how to use a tuner for violin.
Keep reading to learn how to tune your violin with a tuner and using its peg so you can be on your way to playing like a professional! You can also check out this instructional video:
How to Tune Violin with a Tuner
What You’ll Need:
When violin tuning, you’ll need a chromatic tuner, which you can find at any music shop. These tuners usually run from $30 to $40. There are also free versions online.
If you have a smartphone, you can also download a tuning app for free or cheap. Just search for “violin tuner” or “chromatic tuner” in your app store.
Every violin tuner is slightly different, but they’re all usually pretty easy to work with after you get used to it.
Generally, there will be a display that tells you what note you’re playing and a needle hovering over a dial in the middle that will show you how in tune your string is.
You want that needle to be as close to the center point as possible. Most violin tuners light up green when the string is in tune.
If the needle is hovering over to the right of the dial your string is “sharp,” which means it’s too high or tight. If it’s hovering over to the left of the dial your string is “flat,” which means it’s too low or loose.
How to Tune a Violin With Pegs
On the violin, there are both pegs and fine tuners. Use the pegs when your instrument is really out of tune. Meanwhile, the fine tuners are used when it’s just slightly out of tune.
When you’re just learning how to tune a violin, it’s easiest to avoid using the pegs, as they can be very hard to work with. Ask a violin teacher or someone at a violin shop to set your pegs for you.
Normally, the pegs should stay in place most of the time unless they get bumped or your violin is exposed to extreme temperatures. However, if you notice that your pegs are slipping multiple times a week it would be a good idea to take your violin into a shop to get it checked out.
If your pegs unravel and you don’t have access to someone who can help, start by slowly tightening your pegs. You’ll want to do this very carefully because the string can easily snap. The old saying “righty tighty, lefty loosey” applies to violin tuning.
If you turn the peg to the right, you’ll notice the string is tighter and sounding higher, or sharper. If you turn the peg to the left, you’ll notice the string is feeling looser and sounding lower, or flatter.
Names of the Violin Strings
When you’re learning how to tune a violin, it helps to know the names of the strings. On the violin, there are four strings. Starting with the thickest string, they are G, D, A, and E. An easy way to remember this is to use the mnemonic device below:
- G = Good, D = Dogs, A = Always, E = Eat. Good dogs always eat!
When first learning to tune a violin, always start with the A string. In a sitting position with your violin upright on your knee, use your left hand to pluck the string and use your right hand to turn the peg.
Pluck the string as you turn your peg to the right to make it tighter and look at your tuner to see how close to the middle dial it is.
When it’s right in the center, bring your left hand up to the scroll and support it as you press the peg firmly into the hole to make it stay exactly in that spot, being careful not to let it move.
If the peg turns even a hair while you’re pressing in, it can make the string go out of tune. The real trick here is to press the peg into the hole it sits in firmly, and sometimes you will have to use all of your strength to make it stay where you positioned it.
SEE ALSO: Pros and Cons of the Suzuki Violin Method
If you can’t get the string perfectly in tune, that’s okay. Just get it as close as you can and we’ll do the rest when we fine-tune.
Depending on what kind of condition your violin is in, it may take several tries to get the peg to stay in place. As I said earlier, it’s best to get help from a violin teacher or violin shop if you’re having problems with your pegs.
For the rest of the pegs, you’ll use the same process except when you go to tune the G and the D strings. For this, you’ll switch hands and use your left hand to turn and your right hand to pluck and support.
How to Tune the Violin Using the Fine Tuners
Now, let’s move on to fine-tuning. First, hold your violin in your normal playing position with your chin. Bring your left hand under the violin to hover over the fine tuners so you can turn them as you’re bowing the strings.
We’ll start off with the A string and tune each string until the dial is in the center. The same principles apply here: if you turn to the right, the string will get higher or sharper. Turn it to the left, and the string will get looser or flatter.
If you notice that the fine tuner is turned as tight as it will go you will have to loosen it all the way up. If it starts rattling you’ll know you’ve gone too far. Then re-tune with the pegs followed by some touch-up tuning with the fine tuners.
Common Violin Tuning Problems
If you seem to be having issues, these are some common problems when learning how to tune a violin.
- Pegs slipped out of place: Try to unwind the peg a round or two before tightening the peg again.
- Incorrect string winding: Check out this guide to properly string your violin.
- Worn out strings: Replace your strings every six months or so.
How to Tune a Violin Key Takeaways
Keep in mind that if your violin is new or hasn’t been played in a long time, it’ll usually take a few weeks of constant tuning to get it to stay in tune.
You’ll want to tune your violin every time you play it. Over time you’ll notice that the more you play your violin, the better in tune it will stay.
With lots of practice and patience, you can develop ear training skills that will someday allow you to tune your violin by ear without the help of a tuner. In the meantime, we hope this tutorial on how to tune a violin for beginners helps you get started.
For more help with your violin skills, consider taking lessons with a professional teacher!
 Post Author: Naomi Cherie S.
Naomi teaches violin in Austin, TX. She is a classically trained violinist with over 20 years of experience and a diverse musical background. Learn more about Naomi Cherie S. here.

Brooke Neuman