

New to the guitar? Getting the basics down – including proper positioning and guitar technique – is important from the very start. Here, Lowell, IN teacher Blake C. explains…
Over the years, many experienced guitarists have arrived at my studio doorstep asking for help to improve their playing. These guitarists didn’t understand why they were struggling, and merely thought they were stuck in some sort of a slump. However, the slump that these guitarists suffered was not caused by a lack of musical desire or passion or some other emotional hang-up; poor guitar technique led to their difficulties.
Correcting poor technique is often more difficult than learning proper technique as a beginner. Of course, students can learn guitar basics first, but even the basics are difficult without proper technique. Therefore, it’s a better idea to avoid developing poor guitar technique; instead, study proper guitar technique with a quality instructor who can assist you with learning guitar the right way the first time.
How Do I Know If I Am Using Incorrect Technique?
The simplest way is to set-up an in-person or online video lesson to have your technique reviewed by a professional instructor here at Takelessons.com. If you absolutely cannot take advantage of an instructional session with a Takelessons instructor, below are a few ideas to improve your current technique and guitar playing.
How Do I Identify Guitar Technique Flaws?
Video recording is a good option, but an even better alternative is a bit lower-tech and used at most music conservatories. First, locate or purchase a dressing mirror – these can be purchased for $9 or $10 at most local dollar or general merchandise stores.

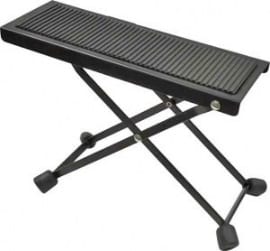
Next, locate or purchase a footstool – these can be purchased for approximately $12.
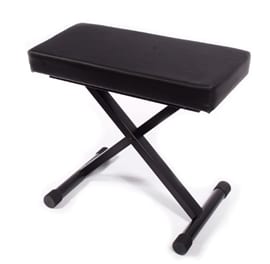
Finally, locate or purchase a good practice chair – adjustable piano benches are available for about $30.
Set Up Your Practice Area
To begin, the footstool is for your left foot if you play guitar right-handed. For left-handed guitarists, use the footstool for your right foot. Next, place the mirror directly across from you, setting it up so you can see your hands.
Once the mirror is in place, get into a proper sitting position for practicing guitar. Sit toward the front of the bench – this will help your posture. Keep in mind, after you have a good handle on using proper technique, your sitting position will not be as critical for performing simple guitar parts or songs. However, when you perform more difficult pieces, you’ll need to be in a proper sitting position. Many guitarists will sit for difficult pieces: Steve Vai, Joe Satriani, and of course, classical guitarists such as John Williams are usually seated when playing difficult guitar pieces.
Next, if you are a right-handed guitarist, place the guitar on your left leg. Left-handed guitarists, place your guitar on your right leg. After the guitar is in place, angle the guitar neck slightly upward, approximately 45 degrees (everyone is different and the angle must suit your body size and shape).
Next, try playing a few musical phrases to check the comfort level of the position. Adjust the guitar angle to the natural and relaxed position of your hand, which typically angles slightly upward. This placement of your guitar is for electric and acoustic guitars. Positioning the guitar in this manner provides the least strain on your hands and body.
Here is an example of proper guitar position demonstrated by one of my young students:

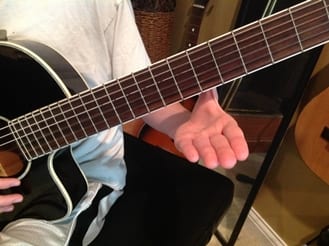
Now that you are in position, let’s begin by focusing on the position of your left hand. First, you should press with the ball of your thumb on the center of the guitar neck.
Your thumb position will change for different styles, pieces of music, and even sections of songs. However, to begin this adventure into correcting guitar technique, press from the ball of your thumb onto the center of the back of the guitar neck.
With your thumb in position, extend your fingers forward and take a look at your left hand in the mirror – it should create a flat surface that is almost parallel to the plane created by the bottom of the guitar neck.
Now, to prepare for a simple, yet very good left-hand exercise, move your hand position to the fifth fret and place your first finger on the “C” note on the fifth fret of the third string.
Keep your first finger depressed while you place your second finger on the sixth fret of the third string, which is a “Db” note.
Next, keep both your first and second fingers depressed while you place your fourth finger on the eighth fret of the third string, which is an “Eb” note.
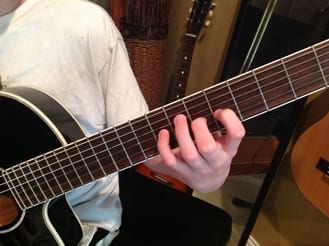
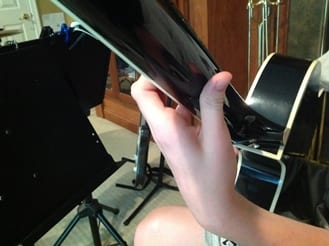
Make sure that you press with your fingertips and don’t collapse your joints.

Notice how the second finger in the image above incorrectly collapses. You will intentionally collapse the joints of your fingers in many instances, but try to avoid it. Next, we’ll dive into some exercises to try – check out part two of the article here!

Blake C. teaches songwriting, singing, and guitar lessons in Lowell, IN. He specializes in classical guitar technique as well as modern rock and blues styles. Blake has been teaching for 20 years and he joined the TakeLessons team in July 2013. Learn more about Blake here!

Photo by Chris Hawes

Suzy S.