
Do you want to learn how to begin playing drums but aren’t quite sure where to begin?
On top of wondering, “how to get started playing drums?” you may be asking questions like, “how to learn the drums at home?” or, “How can I learn to play with a band?” This guide will get you pointed in the right direction!
Like most tasks in life, the first steps are often the most challenging. Just by finding this guide, you’ve demonstrated that you have an interest in playing the drums and a determination to learn more about them. Your enthusiasm for the drum set will be what motivates you to put in the practice and reach your full potential as a drummer, even if you’ve never touched a pair of sticks before.
In this article, we’ll break down simple drum exercises for beginners along with the basic information to get started. This will give you the solid foundation you need to have the best possible beginner drums lessons experience.

How to Start Playing Drums for Beginners
Table of Contents:
- The Parts of a Drum Kit
- Drum Equipment for Beginners
- How to Hold Drum Sticks
- How to Play Drum Rudiments
- How to Read Drum Sheet Music
- How to Read Drum Tabs
Parts of a Drum Kit
Some of us started our foray into percussion by banging on pots and pans in our parents’ kitchen. Others may be proficient finger-drummers, grooving on tabletops and steering wheels. At some point or another on our rhythmic journey, we get interested in sitting behind a drum kit of our own.
One of the most intimidating things about learning how to play drums is the cost of getting started. Oftentimes, instruments don’t come cheap. And unlike most other instruments, the drum set is composed of several pieces of expensive gear — it’s not just one simple piece.
Before we look into alternative options for beginners, take a look at the basic parts for buying drums for dummies.
Snare Drum
The snare is the center of a five-piece drum kit. The snare drum is responsible for the loud crack, usually on upbeats, that you hear during your favorite songs.
The snare’s sound comes from its shell, which is generally made from wood like maple, birch, or mahogany, or from metals such as aluminum, bronze, brass, or stainless steel.
The drum head (batter) is coated, while the bottom of the snare is thin and responsive. The rims are the hoops on the top and bottom that secure the drum heads on the snare.
While all of the parts of a drum kit are important, developing your snare drum skills can help you become a better all-around drummer. In fact, it’s good to practice some snare drum exercises so you can improve your technique and focus on things like rhythm and intonation.
Bass Drum
The bass, or kick drum, is easy to find because it’s the largest drum in a drum kit. Most bass drum shells are made from woods like maple, heartwood birch, and mahogany, but you can also find bass drum shells made from metals.
When you play the bass drum, you use your foot on the drum’s kick pedal to produce a thumping sound. The bass drum is essential to the drum kit because it’s the most distinctive part of a band’s timekeeping.
Timekeeping refers to a drummer’s ability to play in time with the pulse of the music. It’s a very important skill for drummers to learn. Make sure you practice this and improve your timekeeping skills in order to develop a consistent tempo when playing.
Toms, Hi-Hat, and Cymbals
The toms, or tom-toms, are mounted either above the bass drum or held up by adjustable legs. In a five-piece drum kit, there are two types of toms: the rack toms and the floor toms. The floor and rack toms are most commonly used during drum fills. Like the other drums in the kit, the toms are generally made from wood or metal.
In addition to these basic parts of a drum set, you can also add cymbals like the hi-hat, crash, and ride cymbals. These add accents to your music and can serve as transitions from one passage in a song to the next.
Most beginner drummers don’t have the luxury of having a full drum set at their disposal. Luckily, you don’t need a complete drum kit to get started when learning how to play the drums.
Drum Equipment for Beginners
The first piece of drum equipment that we recommend for students is free and readily available: your own body. Start with hand drumming, whether that’s playing on your thighs, a pillow, or anything else you can think of that won’t get damaged from repetitive hand tapping.
Start by tapping along to your favorite songs and focus on playing along with the drummer or another instrument in the song. If you don’t have immediate access to music, then simply practice keeping a steady tempo, alternating between tapping with your right hand and then your left hand.
Sticks and a Metronome
When you’re ready to take the next step, the first piece of gear we recommend purchasing is a pair of good drum sticks. You can find drum sticks at any music store and countless online stores, and they’re very affordable (most pairs are less than $8). We also recommend buying a rubber practice drum pad in the early stages, but if money is an issue, you can always use your drum sticks on a book, pillow, or any other firm, durable surface.
One final piece of equipment that will help you begin your journey of learning how to play the drums is a metronome. Drummers are expected to be able to maintain a steady tempo, and nothing keeps a steadier tempo than a metronome. Metronomes come in both analogue and digital.
We recommend practicing with a metronome at the beginning of your drumming journey, as it’ll help you develop a strong sense of time and rhythm. This will save you a lot of headaches later on. The accent feature on your metronome can change the feel of what you are playing and help you explore different time signatures.
Most simple drum beats are in 4/4 time, but you can also explore tuple rhythms such as 3/4, 6/8, and 12/8. For a greater challenge, check out “odd meters” such as 5/4 and 7/8. While time signatures like these may intimidate beginners at first, it is commonplace in other musical traditions to explore these rhythms from the start. In Indian classical music, for example, percussionists give equal credence to common meters and odd ones.
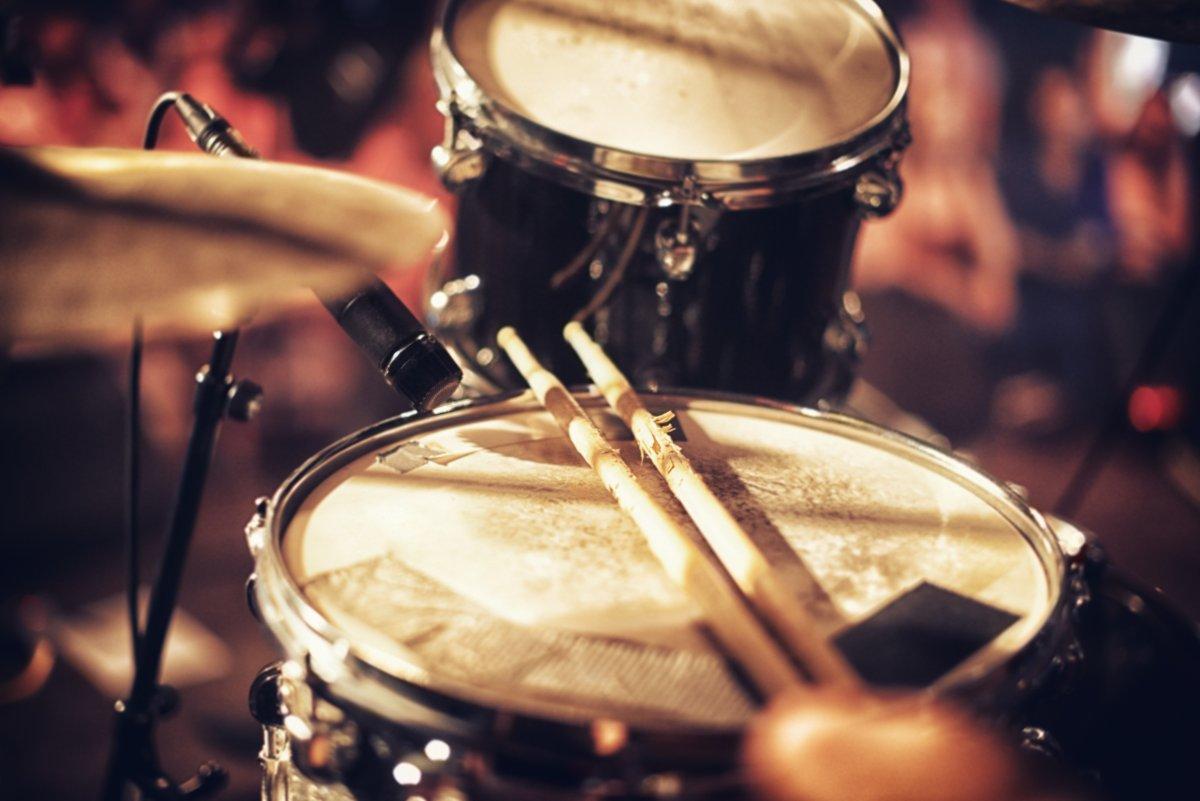
How to Hold Drum Sticks
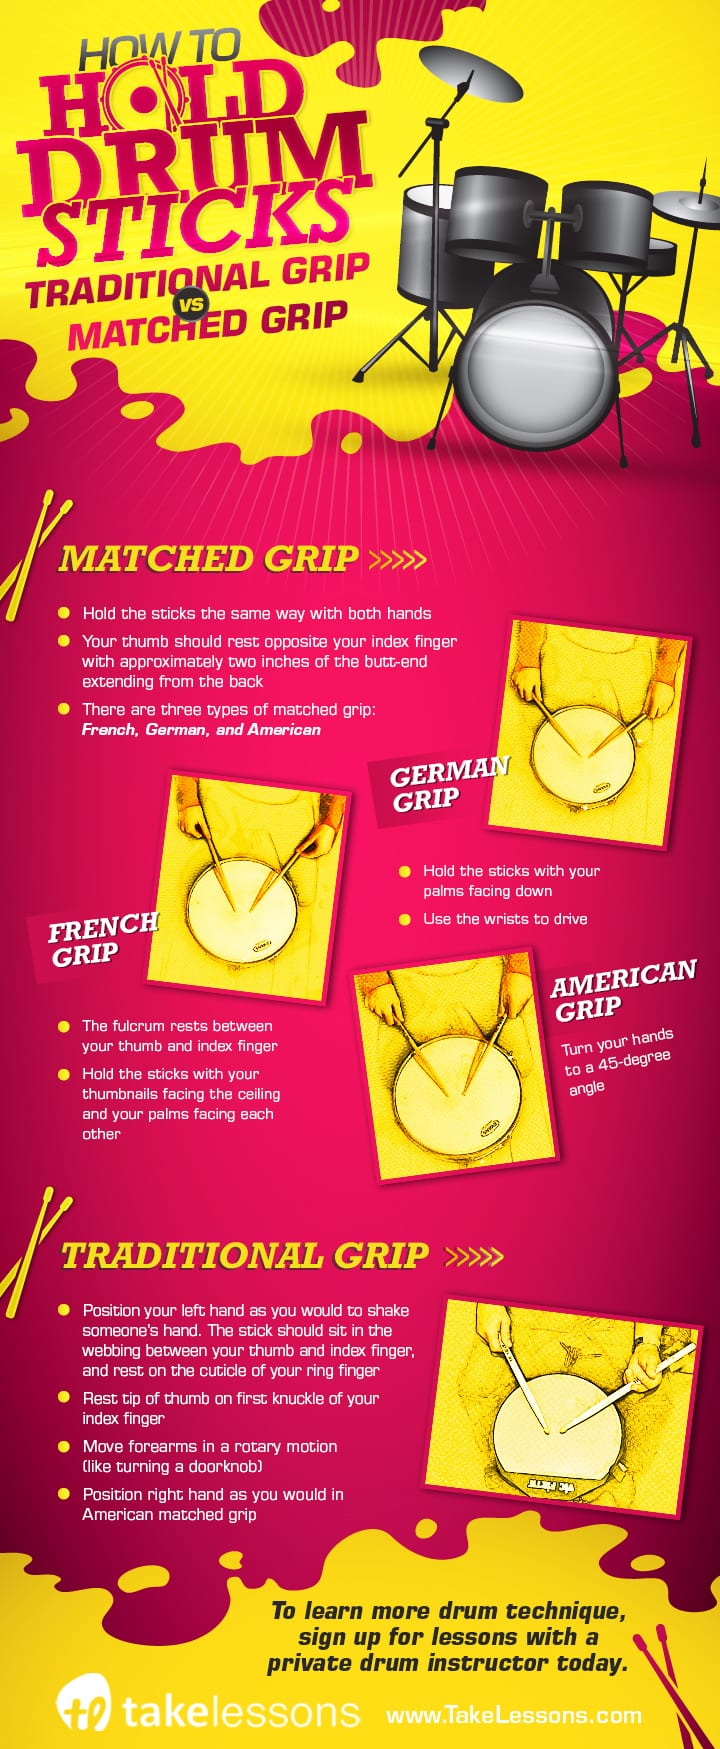
Now that you’ve got a pair of drum sticks, let’s talk a little bit about how to play drums with the proper technique. There are essentially two ways to hold drum sticks: matched grip and traditional grip.
Matched Grip
With matched grip, you’ll hold the drum sticks the same way with both hands. Your thumb should rest opposite your index finger on the stick; this pinching between your thumb and index finger is your fulcrum or pivot point. Matched grip has three different variations: German, American, and French.
German Grip
Hold the sticks with your palms facing down and use your wrists to drive the motion.
American Grip
Turn your hands to a 45-degree angle. With this grip, you can use your wrists for power and your fingers for control.
French Grip
Hold the sticks so that your thumbs face the ceiling and your palms face each other. The fulcrum rests between your thumb and index finger.
Traditional Grip
Traditional grip is often used for jazz music and drum lines. To do this, extend your left hand as if you’re about to shake someone’s hand. Place the stick in the webbing between your thumb and index finger, and rest the stick on the cuticle of your ring finger. Rest the tip of your thumb on the first knuckle of your index finger.
Your middle finger should rest lightly on the top of the stick. The fulcrum, or pivot point, is between your thumb and index finger. You’ll grip the stick in your right hand the same way you do with the American matched grip. In traditional grip, you’ll rotate your forearm as you play (think of twisting a door knob).
As you advance, you can decide which grip style works best for you. The most important thing is to establish good drum stick technique. Poor technique can make drumming more challenging and also increase your risk of injury.
If you need a visual, here’s a helpful infographic on how to hold drum sticks:
How to Play Drum Rudiments
Once you have your basic equipment (drum sticks, playing surface) and a good sense of proper technique, you’re ready to start learning the fundamental patterns of drumming, or the simple drum rudiments.
Drum rudiments are often described as the basic building blocks of learning how to play the drums. There are 40 essential rudiments, each of which consist of a unique sticking pattern (coordination of right and left hands) and distinct rhythm. Mastering all 40 rudiments provides you with a wealth of control and rhythmic knowledge that you can then apply to the entire drum set.
Don’t be intimidated about learning all 40 rudiments right away. Here’s a step-by-step video to help you learn the seven essential drum rudiments. As a beginner, these seven drum rudiments will give you a solid foundation and help you learn to play basic drum patterns and songs.
How to Read Drum Sheet Music
Drummers are encouraged to learn how to read drum notation. Many drummers are also expected to know how to read sheet music, as it’s a requirement of school concert bands, marching bands, jazz bands, and many professional ensembles. When you understand drum sheet music, it can be used as a drummer’s secret weapon.
Drum notation is a fairly simple code and once you understand the basics it becomes easy to apply that knowledge to more advanced concepts. It’s important for beginning drummers to start with reading very easy drum rhythms before trying to jump into understanding intermediate drum beats.
Start Out Simple
For example, begin with exercises that use a combination of quarter notes and quarter rests with all notes being played on only one drum. Read rhythmic exercises out loud before trying to play them on the drums, because it strengthens the connection between your brain and limbs and it mentally prepares you for the exercise ahead.
Reading the exercise before playing it also allows you to locate any challenging rhythms and work them out ahead of time. Once you have read the rhythm out loud, it’s time to play!
With beginning rhythms, you should focus only on the coordination of your left and right hands (no feet yet) and ensure that you’re playing in time with a metronome. This lesson introduces basic drum notation in a clear and easy-to-understand fashion. The accompanying audio clips are also extremely helpful.
Get the Rhythms Down
Regardless of your skill level, we strongly suggest beginning your practice routine with simple drum rhythmic exercises involving just your hands on one playing surface. This will help you improve your coordination and timing, and mentally prepare you for more difficult exercises.
Once you’ve learned how to read and play rhythms on one drum, it’s time to add another playing surface. Still focusing on only the hands, start to play patterns that involve the left hand playing one rhythm while the right hand plays another. Most drum beats involve at least three different playing surfaces, but beginners should focus on just the snare and cymbal.
When you can accurately play exercises that involve two different rhythms with the hands, then it’s time to add the feet. First add your kick drum foot, working on exercises that focus on coordination between both hands and your kick drum foot.
Coordinate the Limbs
If you’re having trouble coordinating all three limbs, break the exercise down so that you’re only focusing on two limbs at a time. Make sure that you’re comfortable with each limb combination before trying to put all three together again.
Eventually, you’ll also want to start working your fourth limb, the hi-hat pedal foot. Like the other limbs, start with very basic exercises that coordinate all four limbs before trying to learn more advanced drum beats.
Be aware that drum notation for the full drum set is much more challenging to read than snare drum notation because there are many more drums/cymbals involved.
How to Read Drum Tabs
Drum tabs are different from sheet music because they’re written specifically for the instrument. They use the parts of the drum set that we talked about earlier. Drum tabs use abbreviations for the drum parts, for example:
- CC – Crash Cymbal
- HH – Hi-Hat
- Rd – Ride Cymbal
- SN – Snare
- T1 – Hi Tom
- T2 – Low tom
- FT – Floor Tom
- B – Bass Drum
- HF – Hi-Hat (with foot)
- O – Bass Drum hits
- X – Snare and Hi-Hat hits
Here’s an example of this practice in the “two and four” beat from this article about easy drum beats for beginners. The drum tabs appear as follows:
- HH: X X X X
- SN: X X
- B: O O
Here’s another example from the “boom, boom, clap” beat:
- HH: X X X X
- SN: X X
- B: O O O O
These simple drum tabs show you which parts of the kit to use (hi-hat, snare, and bass) and when to play them. You can learn more about drum tabs in this beginner’s guide to drum tabs.
How to Learn Drums for Beginners
Once you’ve got a pair of a drum sticks, a playing surface, and practice materials (rudiments, sheet music exercises), it’s time to hit the woodshed! Like any other skill, good practice habits are the key to becoming better at your craft!
Start out practicing with these essential drum beats and these easy drum songs for beginners. Another great way to learn how to play the drums is to practice along with your favorite songs.
While practicing, it’s very important to check in and make sure you’re using proper techniques. For example, ask yourself, “Am I holding the sticks correctly?” or, “Am I playing this rudiment correctly?” You can read resources such as this guide to point you in the right direction and check out the numerous teachers on YouTube. If you’re serious about improving your drum skills, working with a drum instructor is the best way to go.
Your teacher can give you feedback about your rudiments and provide you with a clear path toward drum mastery. No matter where you’re headed, remember to carry a pair of sticks with you. That way, you can work on beats all day long!
What are your favorite ways to sharpen your drum skills? Let us know in the comments below!
 Post Author: John S.
John S. is a drum and percussion instructor in Saint Paul, MN. A full-time musician and teacher, he performs with two different bands and teaches in-home and in-studio lessons. Learn more about John here!
Photos by Brandon Nguyen, Vladimir Morozov, Maxime Seguin, Jeremy Wright, Edwin M Escobar

John S.